I decided to share my new DIY. This time I’ll show you the process of creating such a cute brooch. I organized a workshop in my city and each participant left it with a brooch in hand and a happy shiny expression on face as a keepsake :)
I draw the pattern at my leisure, the wheel wasn’t reinvented, though. It just seemed to me that such tutorial might be interesting, useful and easy, which is important: you could make a lovely brooch of what you have at hand. So let’s start!
You need these materials of a colour scheme you like:
– seed beads of your favourite diameter, mine is 2.5 mm. I took orange ones;
– beads of a different diameter, 4 mm and 6 mm. Different shades (as my colour scheme is grey and orange, I chose similar shades);
– central bead / button / crystal — pick what you want :))
– piece of dense felt;
– piece of thin felt of the colour matching the dense felt (you may use thin leather or any other firm material without fraying edges);
– scissors, needle and threads.
More info: livemaster.com

I use a 5 mm silvery bead for the center. That time I used 12 beads per each row; this number depends on the size of the central bead / button / crystal and on the size of beads in the first row. Sew the central bead to the middle of the dense felt.

Take beads of any size you want and sew them around the central element. Make sure that there are enough beads to complete the circle. I took 4 mm light grey beads.

Sew other 6 mm beads into the slots between the beads of the first row.

Then take 4 mm beads (of a smaller size) for the next row; they should be sewed into the slots between the beads of the preceding row. I used dark grey beads to make the pattern contrast.

Embroider the last row with 6 mm orange beads — I introduced colour into the pattern.

The last row is sewed with seed beads. Pick two seed beads on the needle, sew them and go back by passing the needle through the last seed bead. Repeat it a number of times to accomplish the pattern. I sew these «arches» anticlockwise and tighten the thread for the beads to cover the surface smoothly.


I cut out the brooch, close to the base and keeping all necessary elements safe.

Fill free spaces with 4 mm beads.

Cut out a matching piece of thin felt for lining.

Now sew the lining to the brooch. I use one of appropriate stitches. The needle passes through the edge of the lining and then picks a seed bead. Then push the needle through the two felt pieces at once joining them. Next, pass the needle through the appeared loop. Then I repeat all again.

Have a break, let your eyes rest on something far away on the horizon… Then strain your eyes and look at something nearby. My favourite eye exercise)


Now sew the finding to the brooch. Use the same thread to avoid extra knots. The finding could also be hidden under the base, but before cut through little slits to take the details out.

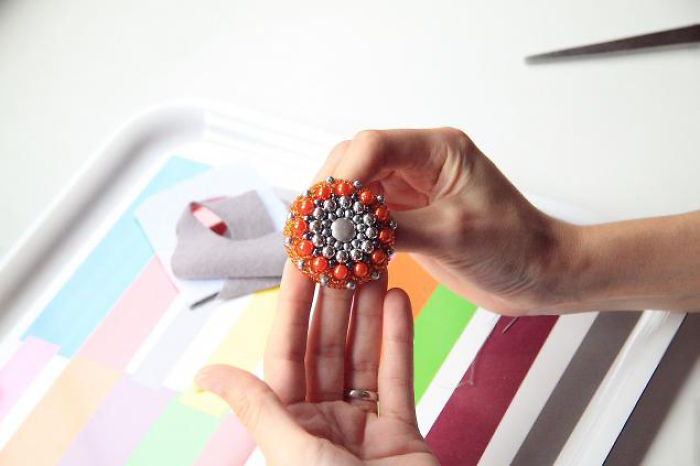
The brooch is ready! To make something different, one could combine colour scheme, bead size, brooch size and the number of elements. Add a small chain or turn the base into earrings, pendants and other accessories.


2
0