My kitchen was dark and outdated. I wanted something fresh and new. But, I didn’t have the money to hire a carpenter, nor did I have alot of money to completely redo the whole thing. I was playing around with ideas on what I could afford. My budget was $500. So I started looking into painting my cabinets to just give the kitchen a bit of a face lift. I also decided to redo the flooring and counter top. I really wanted a new stove but my old one worked fine, it just didn’t match and a new one would take up my whole budget. So I had to really plan well on this and paint, was the cheapest way to go.
Since I work full time, but not always busy, I did most of my shopping for my makeover on Amazon and had all the items sent to my house. I started my makeover with my stove. I turned my regular white stove into a stainless steel stove by painting it from the stainless steel paint I bought on Amazon. If you follow the directions and take your time, it will come out very nice. I worked on my stove in the evenings after work for about 3 days. I used Giani Granite FG-RDKIT Range and Dishwasher Kit it was $25, on the sides of the stove I painted them a darker grey to match my refrigerator. The knobs I spray painted black and used my printer and clear labels to make the little pictures of the burners and words. I put the labels in the correct spots and used clear coat to seal them. I went to the manufacturing website of my stove and bought the clock replacement sticker. Mine was white and I bought the black one and now the stove looks like it was purchased stainless steel.
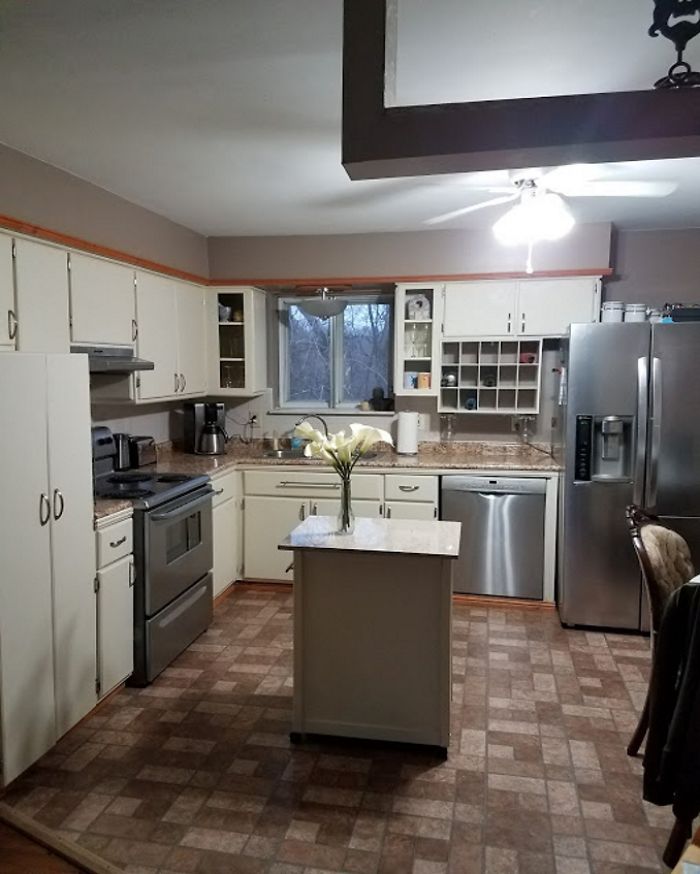
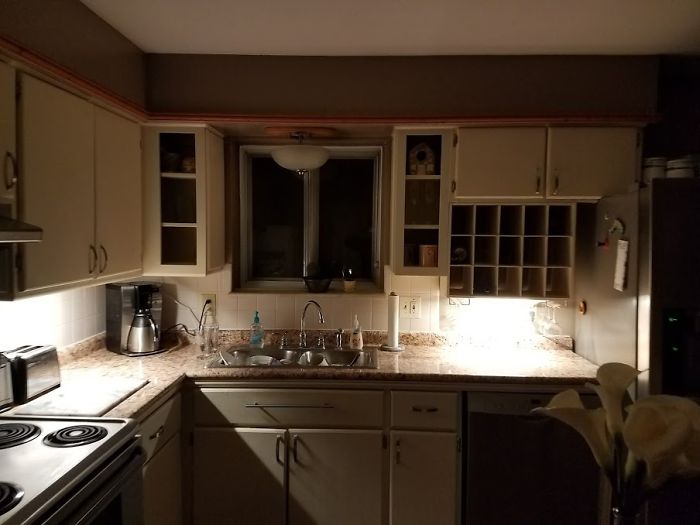
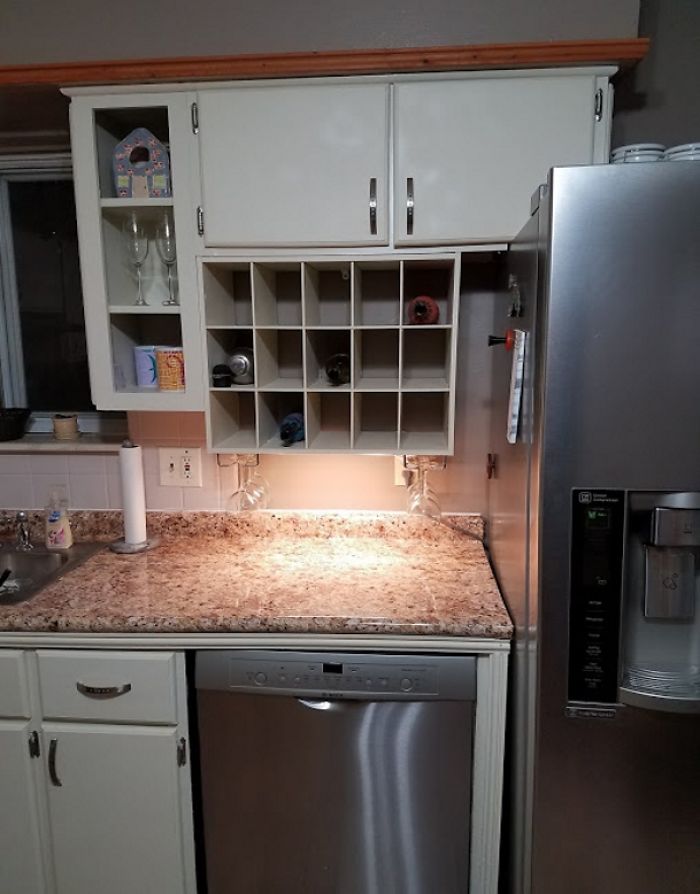
My next project was the walls and cabinets. I took a 3 day vacation from work to redo my kitchen and also have had the whole weekend, so a total of 5 days. I choose to paint the cabinets antique white, (got at wal-mart) which really looked good with the stainless steel stove and my other appliances that already had. The wall paint I choose the colors called old newspaper and taupe. The cost of paint was about $36 then I had to buy the tape, rollers, etc. On cabinets its important to remove any shinny finish or paint you have, so I used low odor paint and stain remover then hand sanded it, to prep it for the paint. This was the longest and hardest part of the job, and if you do this, wear gloves. I used a wood shoe rack as a wine rack painted it the color of the cabinets and hung it on the wall. I painted the tile on the wall. I cleaned it very well, used a smooth roller then used clear coat. I also left the doors off my two cabinets by the window to give it a more modern look, I might get glass for them, or put the doors back, not sure, but I can do that at any time. My house is old and appliances are newer so my kitchen doesn’t fit the refrigerator very well, but it will have to do.
Kitchen counter, this was the most interesting job I did. Counter top is so expensive and I do not know how to cut it, and can’t lift it either. So, I bought a laminate sticker on Amazon for my counter. Unbelievable real looking and durable. You literally, stick it on top of your old counter top. Take your time, stretch it and smooth it to get the bubbles out and it will look great. Careful on corners and edges and fold them in properly to give it a nice look. My counter top (the original one I covered) was cut crooked and left a gap that went from .5″ to 1.5″ and was uneven, so I was able to use shims to fix the gap and epoxy to even it out, then covered it with this laminate. It is smooth and it now lines up with my stove. I used Instant Granite Counter Top Cover, 36″ X 12′ Film, Venetian Gold $60.
The most expensive part of this kitchen, was the flooring. I went to several stores trying to find the flooring I wanted. First, I picked out 18″x 18″ tile because I thought it would be cheaper in the long run, it wasn’t. So I bought the standard 12″x 12″ self adhesive flooring. The flooring I bought was $0.41 a tile. I choose a style that had lines on it so I could cut it straight. It was $129 total to buy the flooring but I do have half a box left over for replacement pieces if needed. I tried to scrape up the old flooring but that was impossible so I just put it on top the already existing floor. I didn’t have any loose pieces or I would have re-glued them. I started under the stove by the cabinets and moved my way across the floor. The threshold between the kitchen and the living room was a slight challenge because it was a large area and had a weird angled curve. The people at home depot cut the wood piece for me because I didn’t have a saw and didn’t know how to cut an angle.
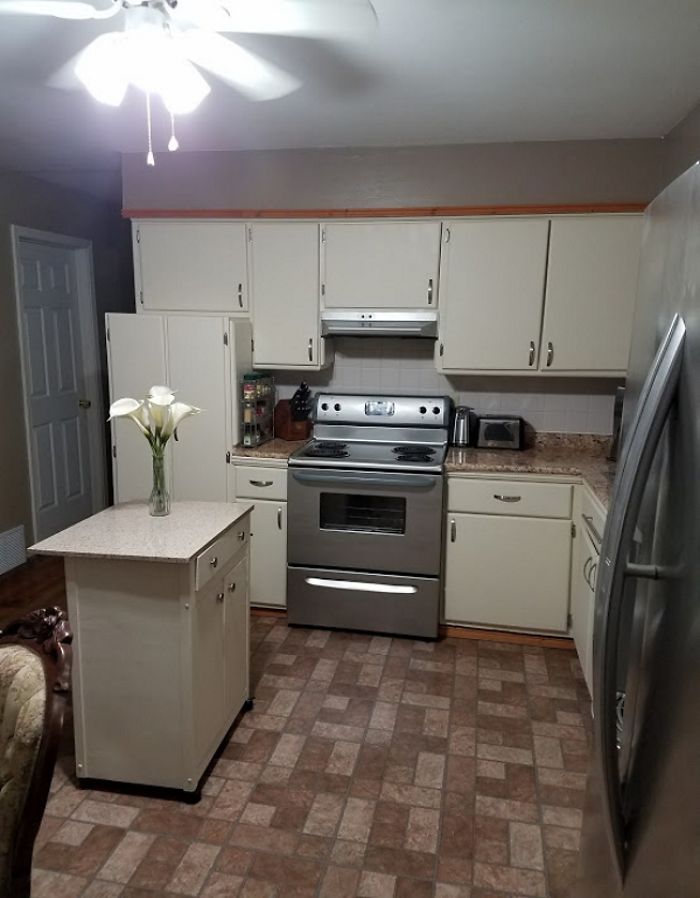
My boss gave me an old microwave cart and I painted it the same color as my cabinets. I took one of the large drawer handles left over from the old kitchen and mounted it to the cart and use it as a towel rack and also found a square piece of real granite that was left in my backyard many long years ago, it matched my counter top pretty close. I turned this gem into a kitchen island, which gives me more cabinet space and another drawer.
The little things added. I put wine glass holder under the wine rack, cabinet organizers in the bottom cabinets for my pots and pans, added a spice rack, (cost of that was about $80 total). I also added plug in lighting under the cabinets that I got from wal-mart for $10 each.
I am very pleased with my kitchen, it really brightens up the house and now looks updated. I was trying to refinance my house and really wasn’t sure I would be approved because I wasn’t approved last year, but when the inspector came out, he noticed the updated kitchen right away and put new flooring and updated counter top and cabinets on the paper work. The approval came back on the refinance and the value of my house went up by $5,000. WOW!
I did all the work myself, and for me, just a mom with no carpentry skills or alot of money, my kitchen is now new looking and bright. I really hope I can inspire others to do a kitchen makeover or other job even if you don’t have a ton of money.
I also would like to add, I did this remodel in February 2017 and today is September 7th, 2017 and my counter top, stove and flooring, everything looks just as good as the day I finished it.
Before Kitchen Remodel
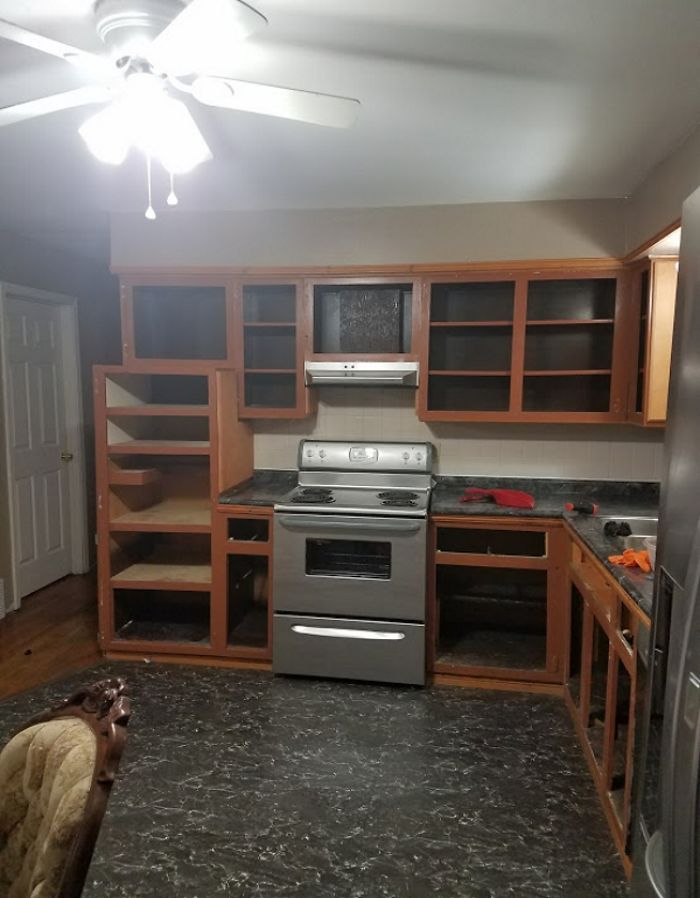
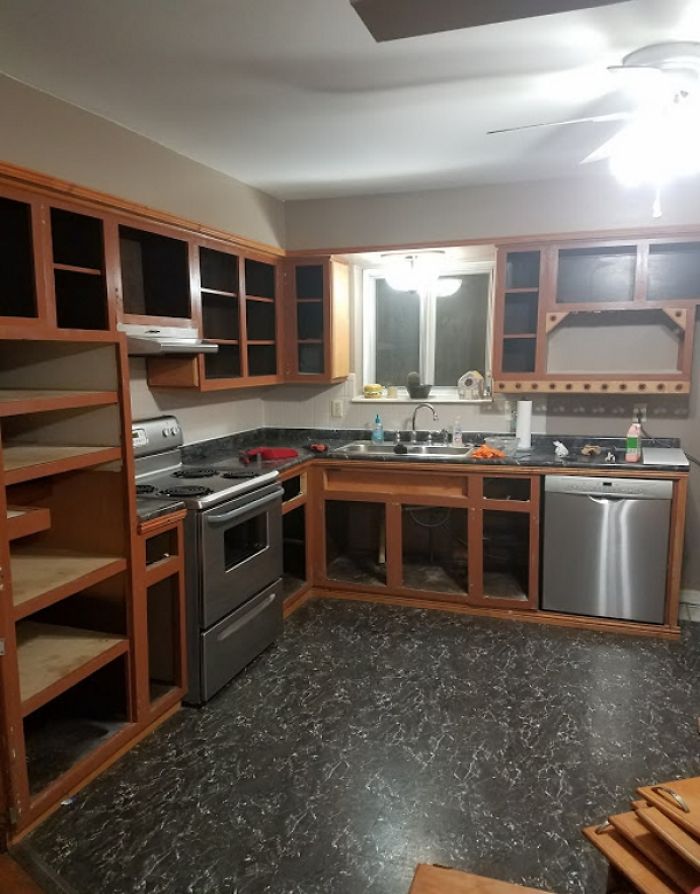
taking out cabinets to strip (you can see my painted stove before I did the knobs)
lots of work to do
Kitchen After
Stove after the knobs were painted and labels made.
cabinet lighting
Shoe rack wine rack
198views
Share on Facebook


3
0