Get Premium
Dark mode theme is available exclusively for premium users. Learn more about the benefits of subscribing.
No fees, cancel anytime.

 Dark Mode Ad-Free Browsing Unlimited Content
 Ad-Free Browsing Unlimited Content Dark Mode
Join 1.2 million Panda readers who get the best art, memes, and fun stories every week!
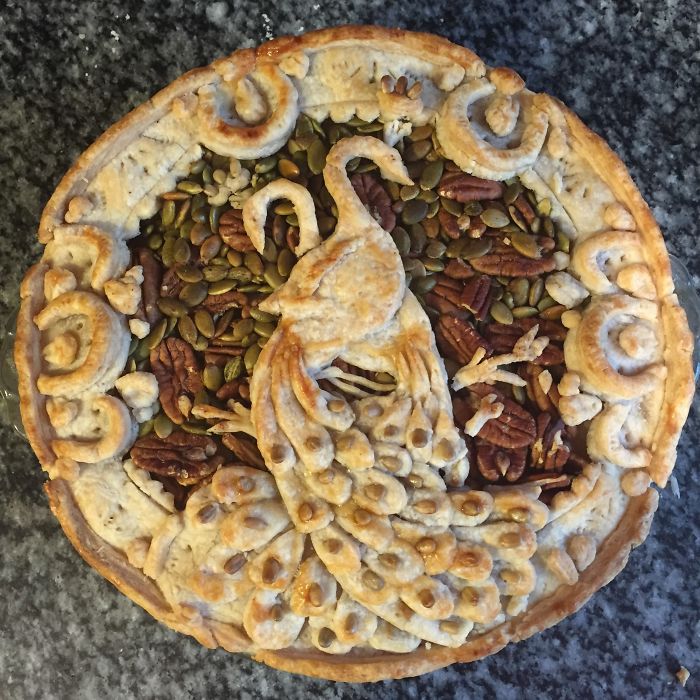
I have experimented with a lot of different techniques this year for creating “pie art” – for Christmas I wanted to make something special for my family, with more detail than I have tackled before. This Peacock pie was very fun to make and I learned some new methods for preserving detail in pie crust, which I share in the picture below. Hope you enjoy!
Two swan/peacocks entwined to create the “suggestion of a Christmas tree” – not sure how well the tree part comes across, but I think the birds look pretty anyway.
It takes a long time to create pies this detailed and I got tired of standing in the kitchen for hours. So after making the dough circles I switched to a more comfy work space. Soooo much more pleasant to make pies this way!
I calculated how much dough I would need to create my design, then cut out two circles of dough the diameter of my pie plate. I froze them for an hour first to make them easier to work with.
I use assorted household items to help block out the basic shapes in my design.
For the finer details, I use a sharp knife and cut out by hand, using my sketch book for reference.
My birds are a cross between peacocks and swans – peacock necks just weren’t doing it for me ;)
Looooots of tail feathers to cut out. Seemed like a good idea when I was sketching…
I used a dot of egg white (pictured in the background) to “glue” the pieces on. Pie dough does not “blend” nicely like clay, so you need to take this extra step if you don’t want the pieces to all fall off after you bake it.
Prettying up the bird’s tails with some sesame seeds.
Adding plumes.
I added a careful wash of egg white to the areas I wanted to brown. Even though it is invisible at this stage, think of the egg as brown paint, only put it where you want to add special highlights.
Ready to pop in the freezer overnight. If you want to preserve the details in your designs and not having everything moosh out in the oven, cold is your friend.
Time is your enemy if you want to preserve your detail now – get that filling (cold filling!) in there as fast as possible and get this puppy in your preheated oven pronto.
Roasted pecans and pumpkin seeds not only provide a nice contrast for your design, they taste great with apples and nutmeg!
For those interested, I made the filling out of 10 large fuji apples, nutmeg, french vanilla extract and cinnamon, boiled for an hour, lightly mashed, drained (you can use the liquid for cider) and put in the fridge over night.
There is a bit of an art to getting the top crust on in one piece so quickly… as you can see we lost a bit of the back bird’s plume, but I don’t think anyone else noticed.
Out of the oven – it worked!
The egg white drizzle helps highlight the wing edges and tail feathers.
The nuts baked nicely too.
Nommed with impunity! Christmas win!
Hope you liked this walk through – if you did, give us a like/share and let me know what you think in the comments!
Until the next pie…


 No fees, cancel anytime


4
0