Capturing And Displaying The Beauty Of High Voltage Electricity Using A Homemade Lichenburg Machine.
After seeing some images online of the incredible results you can get using what’s called a Lichtenburg machine, I had to try it myself. A buddy of mine built the unit (Mr. Lightning) using an old microwave transformer, and parts from a broken vacuum. Knowing the amount of juice moving through this thing, and not wanting me burnt to a crisp, he built in a “hopefully not dead man switch”. That way the current is only flowing when I’m holding down a switch on the handle, and stops immediately when I let go. The current can get very bright, especially when the two parts connect, so I got some welding glasses online, and wear them over my own glasses. I practiced on a few different types of wood, and found that cheap plywood, MDF, and poplar seem to give the best big blooms and tree like structures in the wood. If the wood it too grainy, the electricity will try and stay in the grain and not bloom out like a tree. Keeping the wood damp, and painting more water before the zap is crucial to the quality of the bloom. The video shows the process of placing the 2 electrodes, painting water with a brush between them, then zapping the board. Afterwards, you scrub the channels that have been burnt into the wood with a metal brush and water, and then apply colored resin. I’ve been making little trays so far, but I’d love to try something like a door or full table someday. Remember, this is extremely high voltage, and not something you want to undergo casually. Be safe.
More info: macmd.com
Video showing the process of woodburning with a high voltage Lichtenburg machine.
It’s amazing to watch each time, and always unpredictable.

Some newly burned poplar. Getting the wood wet is key. My garage smells like burnt leaves…in a good way.

I like to apply colored resin to the burns, and then use a squeegee to remove the excess.

The longer you hold the zap, the more fire which means more burned spots. These can be sanded down to bring out the contrast of the trails. I love how the electricity moves right around the big knot on the left of the board.

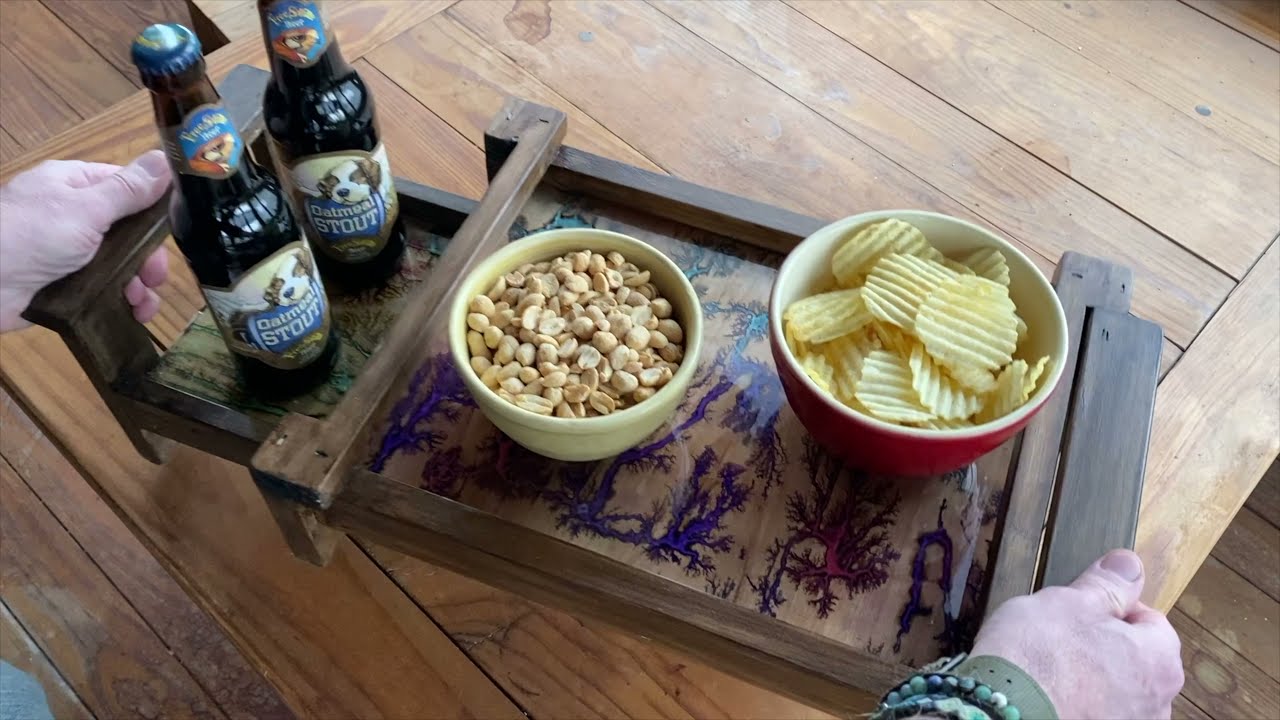
A finished tray. With about 1/8 inch of clear resin applied.


Im horrified by this article! I know 2 different wood workers who have died using the exact same machine. It's so dangerous that the American woodturners refuses to allow any wood thats been fractal burned into their competition. They even keep a list of people who've died doing the exact same thing. Its horrible irresponsible to suggest other people should do it. Any respectable woodworker would be disgusted by this. https://www.woodturner.org/Woodturner/Resources/Safety-Materials/Safety-Fractal-Burning-Lichtenburg-Burning.aspx https://www.woodworkingnetwork.com/news/woodworking-industry-news/fractal-burning-kills-another-and-severely-injures-three-more https://pubmed.ncbi.nlm.nih.gov/32353877/
Im horrified by this article! I know 2 different wood workers who have died using the exact same machine. It's so dangerous that the American woodturners refuses to allow any wood thats been fractal burned into their competition. They even keep a list of people who've died doing the exact same thing. Its horrible irresponsible to suggest other people should do it. Any respectable woodworker would be disgusted by this. https://www.woodturner.org/Woodturner/Resources/Safety-Materials/Safety-Fractal-Burning-Lichtenburg-Burning.aspx https://www.woodworkingnetwork.com/news/woodworking-industry-news/fractal-burning-kills-another-and-severely-injures-three-more https://pubmed.ncbi.nlm.nih.gov/32353877/

1
2