Get Premium
Dark mode theme is available exclusively for premium users. Learn more about the benefits of subscribing.
No fees, cancel anytime.

 Dark Mode Ad-Free Browsing Unlimited Content
 Ad-Free Browsing Unlimited Content Dark Mode
Join 1.2 million Panda readers who get the best art, memes, and fun stories every week!
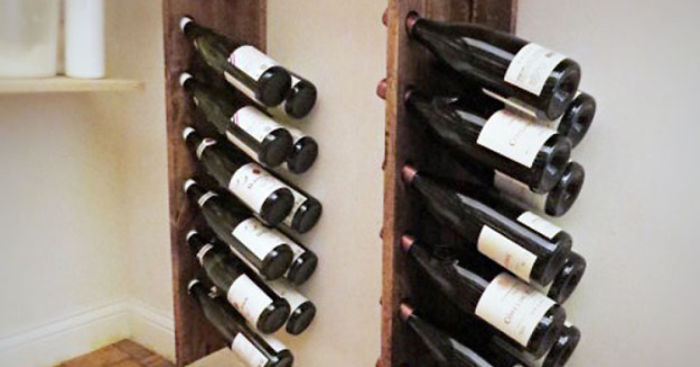
This project is so easy and inexpensive to build, you’ll wonder why you never did it before.
My sweetheart requested some temporary wine storage for our pantry (we get to the bottles quick enough, no need to store cork down) and as I can only create things that look nice, I made these simple racks.
Here they are, all complete and holding those wine bottles. A full case each mind you!
I purchased just two 1×6 pine boards, that’s all it took! Of course your dimensions may vary. My lengths were about 3′.
Next up, lay out your holes on center and using a 1.5″ hole saw, drill them out.
I used a sander and a rotary tool with a drum sander to tidy up the boards and holes.
Place one board perpendicularly on the other, glue if you’d like, and screw in from behind.
Now you can finish the wood any way you please. I used Watco Danish Oil in Black Walnut.
Using screw-in wall type anchors, attach the wine racks to the wall. Load them up with wine, empty them, and repeat!
And make sure they are well rewarded for their efforts.
2Kviews
Share on Facebook
I mentioned in the intro that this is temporary storage, that we get to the bottles quick enough that tilting down is not an issue. Thanks.
I mentioned in the intro that this is temporary storage, that we get to the bottles quick enough that tilting down is not an issue. Thanks.


 No fees, cancel anytime


22
2