DIY Shape-Shifting Lamp That You Can Flip, Swirl And Arrange However You Want
This stacked lamp was inspired by a very expensive designer lamp I found online (it was 650 euros), I decided to make my own using free software, then printing the cutting templates out on an office printer.
I’ve included templates of this design, so you can make your own with the tutorial provided on Instructables.
More info: Instructables
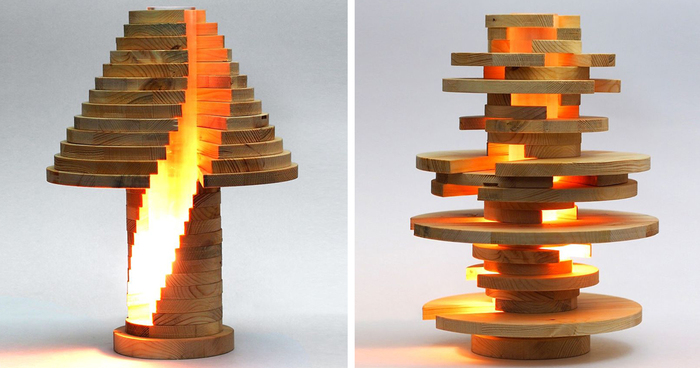
Stacked Lamp

Here’s the finished lamp with the slices rotated.
Print and cut template

Here is the template. I cut out the shapes, then I taped the pieces together.
Glue to wood

The templates were glued to the wood using spray adhesive.
Cut shapes

Print paper template and stick to wood. Cut out with bandsaw or jigsaw. The center can be cut with a hole saw.
Sand endges

Sand edges starting with coarse grit sandpaper and moving up to fine grit for a nice finish.
Sand plastic tube

Clear plastic tube was sanded with fine grit sandpaper to give the diffuse glow. After sanding the tube was buffed with a plastic souring pad to soften the appearance.

Fit tube to base

Electrical cord with switch was attached to underside of base, tube was fit on top and pieces were stacked to create lamp.


I decided to coat the wood with boiled lindseed oil for a nice finish without taking away from the look of the wood grain, but leaving it uncoated is just fine, too. This stacked lamp looks amazing, and can be changed to look completely different at any time
Happy Stacking!

Stagger, flip, swirl – any way you stack these slices is sure to satisfy!
69Kviews
Share on Facebook

Waouh this is absolutely fantastic is it YOUR design or did you see it somewhere? I just created my first covered outdoor carpentry atelier and this will be my next project two of these for our night tables THANK YOU! Greetings from Cancouver Canada :-)
Are we related? I just dont see my last name spelled that way often.
Load More Replies...Whoa, this is rad. Thanks so much for sharing this on instructables! And congrats on hitting so many views on there btw.
Love the lamp but am looking for video of interior "cloud" that makes thunder & ligtening. Does anyone know where I could find this "cloud"?
The Paramount Theater in Abilene, TX has a cloud ceiling. Maybe they can help you. Look them up on google.
Load More Replies...Waouh this is absolutely fantastic is it YOUR design or did you see it somewhere? I just created my first covered outdoor carpentry atelier and this will be my next project two of these for our night tables THANK YOU! Greetings from Cancouver Canada :-)
Are we related? I just dont see my last name spelled that way often.
Load More Replies...Whoa, this is rad. Thanks so much for sharing this on instructables! And congrats on hitting so many views on there btw.
Love the lamp but am looking for video of interior "cloud" that makes thunder & ligtening. Does anyone know where I could find this "cloud"?
The Paramount Theater in Abilene, TX has a cloud ceiling. Maybe they can help you. Look them up on google.
Load More Replies...
285
22